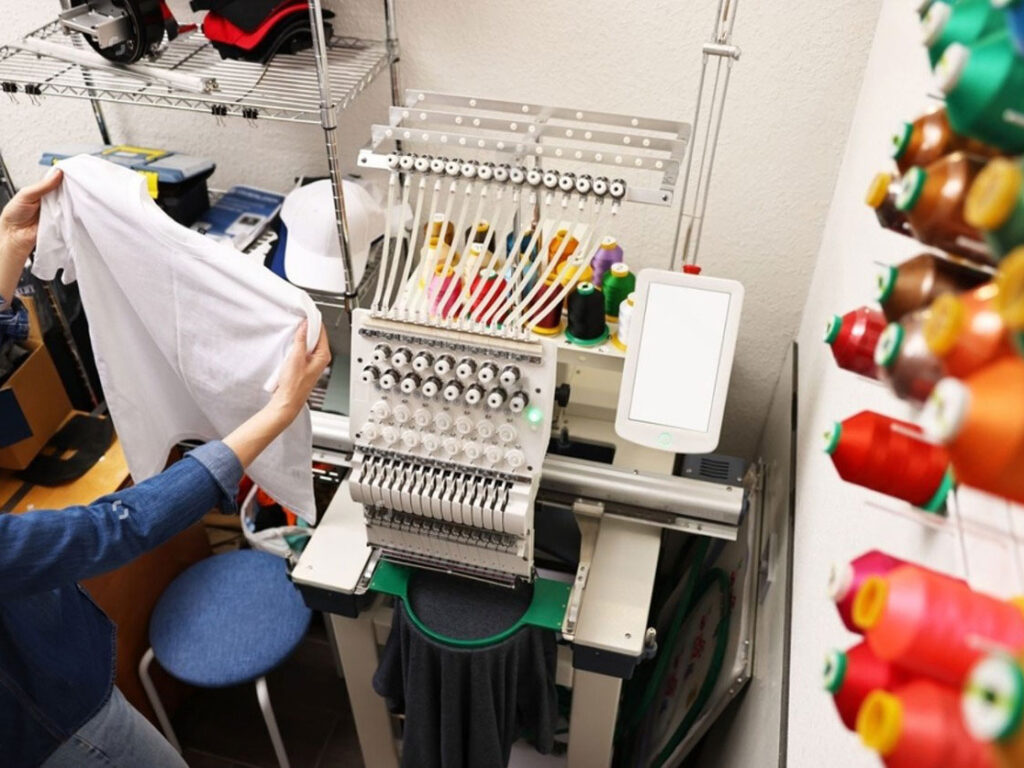
You spent an hour hooping your jacket. You loaded the file. You hit start. Then the design came out looking like a melted cartoon. The letters are squished. The fill stitches have gaps. And somehow the whole thing drifted two inches to the left. We have all been there. Here is the hard truth. You cannot just grab the corner of a design and drag it bigger. Embroidery does not work like a PNG. If you want to keep your sanity and your thread budget, you need to learn how to properly Resize and Align Digitized Embroidery Designs. The good news? It is not rocket science. It is just a few rules you probably never learned.
Let me walk you through exactly what happens when you resize a design, why alignment fails so often, and how to fix both without throwing your machine out the window.
Why Resizing Breaks Everything
Most people think resizing is harmless. You make a logo smaller to fit a hat. You make it bigger to fill a jacket back. Simple, right? Wrong. When you resize an embroidery design, you are not just changing the dimensions. You are changing the stitch density. Density means how many stitches live inside one square inch. Make a design bigger, and those stitches spread apart. Now you have bald spots where fabric shows through. Make a design smaller, and those stitches crush together. Now your needle punches the same hole multiple times. That breaks thread. That shreds fabric. That makes you want to quit embroidery forever.
Here is an example. A design originally sews at four stitches per millimeter. You scale it up by fifty percent. Now you have roughly two point seven stitches per millimeter. That is too loose. The fill will look patchy. The underlay will show through. Your client will ask for a refund. Conversely, scale that same design down by fifty percent, and you jump to six stitches per millimeter. That is too dense. The needle will struggle. The thread will fray. The machine will scream at you with every color change.
Professional digitizers build designs at a specific size for a specific reason. They set pull compensation, underlay spacing, and stitch angles based on that exact size. Change the size, and you break that delicate balance.
The Right Way to Resize Without Tears
You can resize safely. You just have to adjust more than the width and height. If you use proper digitizing software like Wilcom, Hatch, or Pulse, look for a setting called rescale density or maintain stitch count. That option recalculates the stitch spacing when you change the size. It keeps the density consistent. Your fill stays full. Your satin borders stay plump. Your needle stays happy.
If your software does not have that feature, do not resize more than ten percent up or down. Anything beyond that, and you need to re-digitize the design at the new size. I know that sounds extreme. But trust me. Re-digitizing takes twenty minutes. Fixing a ruined garment takes zero minutes because you cannot fix it. You just throw it away.
Also never resize a design after you have already converted it to DST. That is like baking a cake and then trying to change the recipe. It does not work. Always resize in the native workspace of your digitizing software before you export the stitch file.
Why Alignment Fails Even When Resizing Works
You got the size right. The density looks good. Then you hoop the shirt, run the design, and the whole thing sits crooked. Or it touches the collar. Or it hangs off the placket. Alignment fails for three stupid reasons that are easy to fix.
First, you are not using the center point correctly. Every embroidery design has a defined center. That center is where the machine starts stitching. If you place your hoop based on where you think the design should go, but the design center does not match your visual center, it will drift. Always check the design center in your software before you sew. Move the design so its center aligns with your desired placement.
Second, you are ignoring the garment grain. Fabric has a natural direction. Knits stretch more horizontally than vertically. Woven fabric pulls differently on the bias. If you align a design purely by eye without accounting for grain, the design will twist after the first few thousand stitches. The solution is simple. Mark your fabric grain on the hoop. Align your design’s vertical axis with that grain.
Third, you are not using laser guides or center marks. Most modern machines have a laser crosshair. Use it. If your machine does not have one, draw a plus sign on your stabilizer. Hoop so that plus sign sits exactly under the needle at the home position. Then tell your machine to start sewing. That manual method works perfectly and costs nothing.
Pro Tips for Alignment That Actually Stick
Do not trust the naked eye. Your eyes lie. Especially after you have been staring at a hoop for ten minutes. Use rulers. Use marking pens that vanish with heat. Use magnetic hoops if your machine supports them. Magnetic hoops hold the fabric flatter and reduce shifting during alignment.
Always run a test sew on cheap fabric first. I keep a pile of old cotton sheets just for this. Hoop the test fabric. Run the resized and aligned design. Then hold it up to the actual garment. You will see alignment mistakes instantly. Adjust your placement in the software, not by moving the hoop. Moving the hoop introduces human error. Moving the design in software keeps everything precise.
Another trick is to add a center crosshair to your design before you export it. Just a tiny plus sign in a contrasting color. Sew that crosshair first. Check if it lands exactly where you marked. If it does, you are aligned. Then you can either cut that crosshair out or cover it with the main design. Professional shops do this for every multi-hoop project.
When to Let Software Do the Work
You do not need to be a alignment ninja. Good digitizing software includes tools that do the hard math for you. Look for features like hoop mapping, design center alignment, and fabric presets. Some programs even let you import a photo of your garment and place the design virtually. You drag and drop the design onto the photo. The software calculates the real-world coordinates. Then you send those coordinates straight to the machine. That technology used to cost thousands. Now it comes with mid-level software.
If you run a high-volume shop, invest in a machine with automatic alignment sensors. Those sensors detect edge markers on your fabric and adjust the sew field in real time. They cost more upfront but save hours of frustration every week.
Conclusion
Resizing and aligning embroidery designs does not have to make you crazy. You just have to stop treating embroidery like printing. Resizing changes density. Alignment depends on grain and center points. Use software features like maintain density and hoop mapping. Test on cheap fabric. Mark your centers. And never trust the naked eye alone. Every professional embroiderer I know learned these lessons the hard way. They ruined shirts. They snapped needles. They threw away thread. You get to skip that part because now you know better. Keep your stitch density honest, align to the grain, and your next design will sew out exactly where you want it. No melted cartoons. No bald spots. Just clean, professional embroidery every single time.